Salesforce Interview Questions: Important Interview Questions on Lightning Web Components

Q 1: What is Lightning Web Component ?

https://knowledgepredator.com/2020/06…

Q 2: What was the need Lightning Web Component ?

https://knowledgepredator.com/2020/06…

Q 3: What difference you feel while working with Lightning Web Component as compared to Aura Component? https://knowledgepredator.com/2020/06…

Q 4: What are benefits of LWC?

https://knowledgepredator.com/2020/06…

Q 5: Can we use LWC inside Aura and Vice-Versa?

https://knowledgepredator.com/2020/06…

Q 6: Can we communicate between aura and LWC Components?

https://knowledgepredator.com/2020/06…

Q 7: What are life Cycle Hooks in LWC?

https://knowledgepredator.com/2020/06…

Q 8: What are decorators in LWC?

https://knowledgepredator.com/2020/06…

Q 9:What is use of @api and @track Decorators?

https://knowledgepredator.com/2020/06…

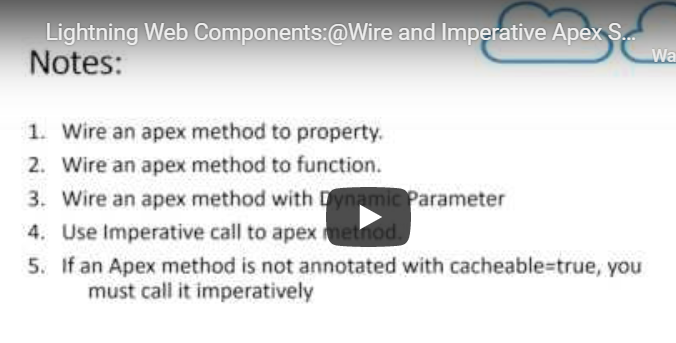
Q 10: Explain @wire decorator?

https://knowledgepredator.com/2020/06…

Q 11: Is it mandatory to write cacheable = true for aura enabled method bind with @wire decorator?

https://knowledgepredator.com/2020/06…

Q 12: What is imperative call to Server in LWC?

https://knowledgepredator.com/2020/06…

Q 13: Can we write cacheable = true on server side method called using imperative way in LWC? https://knowledgepredator.com/2020/06…

Q 14: What is one-way binding and two way binding. Which one is there in LWC?

https://www.youtube.com/watch?v=ZEMpM…

Q 15: Can we make the Wire method to refresh forcefully and bring fresh data from server?

Yes we can do that. Use refreshApex method to acvhieve this.

https://developer.salesforce.com/docs/component-library/documentation/en/lwc/lwc.apex_result_caching

Q 16: What are custom Events in LWC?

https://knowledgepredator.com/2020/06…

Q 17: How can we communicate from parent component to child component in LWC ? https://knowledgepredator.com/2020/06…

Q 18: How can we communicate from child component to parent component in LWC ? https://knowledgepredator.com/2020/06…

Q 19: How can we pass data from parent component to child component in LWC ?

https://knowledgepredator.com/2020/06…

Q 20: Can we call child Component method from parent in LWC?

https://knowledgepredator.com/2020/06…

Q 21: How can we communicate between unrelated components in LWC?

https://knowledgepredator.com/2020/06…

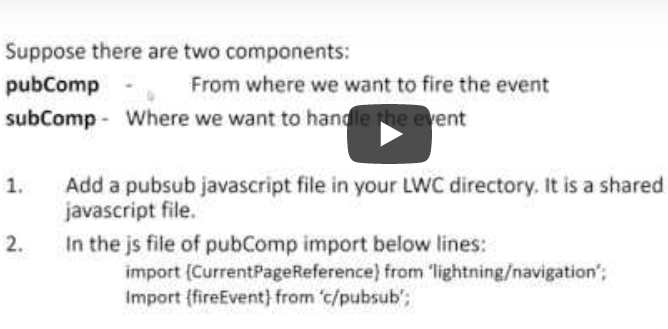
Q 22: What is pub sub in LWC?

https://knowledgepredator.com/2020/06…

Q 23: What is Lightning Message Service in LWC?

https://developer.salesforce.com/docs/component-library/bundle/lightning-message-service/documentation

Q 24: Explain the Folder Structure of LWC Component?

https://knowledgepredator.com/2020/06…

Q 25: Can we include more than one JavaScript file in LWC Component?

https://knowledgepredator.com/2020/06…

Q 26: Can we include more than one HTML file in LWC Component?

https://knowledgepredator.com/2020/06…

Q 27: How can we include LWC Component inside Home Page, Record Page or App Page in Salesforce? https://knowledgepredator.com/2020/06…

Q 28: How can we add Spinners in LWC?

https://knowledgepredator.com/2020/06…

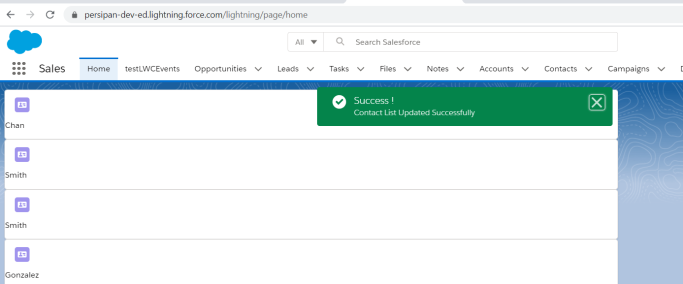
Q 29: How can we add Toast Messages in LWC?

https://knowledgepredator.com/2020/06…

Q 30: How to include LWC Component inside VF Page?

We can include our lwc component inside aura component. Then use lightning out feature to include that aura lightning component inside VF page

Q 31: How to communicate between Aura and LWC component?

We can achieve this using custom events.

Q 32: What is Validity Attribute in LWC?

https://www.youtube.com/watch?v=n3zrp…

Q 33: How to set custom validity in LWC?

https://www.youtube.com/watch?v=n3zrp…

Please check below video if you want to know the detailed explaination of all these questions:

Lightning Data Service in LWC

In this post we are going to discuss about lightning data service in lightning web components.
Lightning data service is a collection of lightning methods and events so it’s nothing but similar to a standard controller in visualforce page.
So you don’t have to write any code to load,create,edit or delete the record in your component.

Lightning data service is built on the top of user interface API. This user interface API is used by the Salesforce to build the
lightning experience and to host the Salesforce on to the mobile devices like Android and iOS. Also lightning data service caches the results on a
client and thus reduces the server trip. It invalidates the cache entries when whenever the dependent Salesforce data or a metadata
changes in one of the components.

Also lightning data service respects the crud access field level security and sharing settings for particular user. Suppose a particular user is
using your component and it does not have FLS for that particular fields or crud access for a records he/she will not be able to see display the record

In lightning web component we can implement lightning data service @wire decorator or
we can implement using lightning record form, lightning record view form or lightning record edit form we have discussed already at the @wire adapter
in one of our previous posts so we are going to discuss :
–lightning record form
–lightning record view form
–lightning record edit form

These are the base lightning components which binds/wires your form to aSalesforce object.
The Lightning record form kind of displays a standard layout whereas if you want to apply certain designing on the fields present in your form then you can use lightning record form, lightning record view form or lightning record edit form.

Please check below video for detailed explaination with examples:

Lightning Web Components:Spinners and Toast Messages in LWC

In this post, we are going to discuss about how we can use spinners and toast messages in lightning web components.

Spinners in LWC

Adding a spinner in LWC is very easy. We can using standard lightning -spinner for this purpose.

We juts have to add following code in out html file :

• Add the following code in HTML file of your component :

<template if:true={loading}>
	<div class="spinner">
		<lightning-spinner alternative-text="Loading"></lightningspinner>
            </div>
 </template>

We need to include this lightning spinner into our HTML file and wrap this spinner using some boolean variable so that you can switch on and off this
spinner as an when required.

Toast Messages in LWC

We have standard event – showToastEvent from platformShowToastEvent library in LWC which we can use for displaying toast messages in lightning web components.

Import standard platform toast event in js file:

import {ShowToastEvent} from 'lightning/platformShowToastEvent’;

• Create Instance of ShowToastEvent with desired parameters :

const toastEvent  = new ShowToastEvent({
                	title :'Success!',
                	message:'Contact List Updated',
              	 variant:'success',
                	mode:'dismissable’
          	});

Paramters for toast messages include:

title(String) – It refers to title of toast messages displayed as header.

message(String) – Its a string containing message for user.

variant(String) – Theme and icon displayed on toast messages. Variant can be:

info – grey toast with info icon. It is the default variant set. success – A green toast with check mark icon. error – A red toast with an error icon. warning – A yellow toast with a warning icon.

mode(String) – Mode decides the behaviour/Persistence of toast message.

dismissable – Remains visible for 3 sec or untill user clicks close button. pester – Remains visible for 3 sec. sticky – Remains visible till user clicks on close button.

Dispatch the event when required

this.dispatchEvent(toastEvent);

Lets implement this:

We will create a lightning component say “ContactlistCmp”. We will create a lightning button, onclick of which we will make server call and fetch list of contacts to display on browser. While fetching the contact lists, spinner will be displayed and once contact list is fetched and displayed successfully,spinner disappears and success toast message is displayed.

ContactlistCmp.html

<template>

    <template for:each={conList} for:item="contact">
        <lightning-card key = {contact.LastName} icon-name="standard:contact">
            <p>{contact.LastName}</p>
        </lightning-card>
    </template> 

   <lightning-button label="get Contacts" onclick = {getcontactLists}></lightning-button>
   
   <template if:true={loading}>
    <div class= "spinner">
        <lightning-spinner alternative-text="Loading"></lightning-spinner>
    </div>
   </template>
   
</template>

ContactlistCmp.js

/* eslint-disable no-console */
import { LightningElement,track} from 'lwc';
import {ShowToastEvent} from 'lightning/platformShowToastEvent';
import getContactList from '@salesforce/apex/contactListCtrl.getContactList';

export default class ContactlistCmp extends LightningElement {
    @track conList;
    @track loading = false;
    /* Using Imperative CAll */

    getcontactLists(){
        this.loading = true;
        getContactList().then(result=>{
            this.conList = result;
            this.loading = false;
            const toastEvent = new ShowToastEvent({
                title : 'Success !',
                message : 'Contact List Updated Successfully',
                variant: 'success',
                mode : 'dismissable'
            });
            this.dispatchEvent(toastEvent);
        })
        .catch(error=>{
            console.log('error#'+error);
            this.loading = false;
            const toastEvent = new ShowToastEvent({
                title : 'Error !',
                message : 'Error Occurred',
                variant: 'error',
                mode : 'dismissable'
            });
            this.dispatchEvent(toastEvent);
        })
    }

}

ContactlistCmp.js-meta.xml

<?xml version="1.0" encoding="UTF-8"?>
<LightningComponentBundle xmlns="http://soap.sforce.com/2006/04/metadata">
    <apiVersion>47.0</apiVersion>
    <isExposed>true</isExposed>
    <targets>
        <target>
    lightning__HomePage
    </target>
    </targets>
</LightningComponentBundle>

Lets include this conponent into Lightning home page. If you click on “get Contacts” button following screens will appear.

Spinner when server call is in progress

Toast message once, contact list is fetched and displayed successfully.

Remember, lightning standard spinner and toast messages does not work in salesforce classic.

So , we will wrap up this post here . Stay tuned for next posts !

Lightning Web Components:@Wire and Imperative Apex Server Calls in LWC

In this post we are going to discuss about how we can make server call to the apex:method from our lightning web component. There are two ways for doing so :

First is using @wire to wire a property or a function in JavaScript to apex method and second is calling an apex method imperatively.

Using @wire to wire a property or function

  1. Make the apex method @AuraEnabled(cacheable =true)

2. Import the apex method into javascript file of your component using:

  import apexMethod from '@salesforce/apex/Namespace.Classname.apexMethod’; 

3. Wire the imported method to a property or function which will receive stream of data from the wire service.


@wire(apexMethod, {apexMethodParams})
propertyOrFunction;

Lets understand this better with implementation.

We will create a component name “getcontactComp”. In these component we will fetch the list of contacts from salesforce and display using for:each iteration and lightning card.

For fetchning the records from contact , we will write an auraenabled method similar to way in which we write for aura components.

Using @wire to wire a property.

ContactController.cls

public class ContactController {
    @AuraEnabled(cacheable=true)
    public static List<Contact> getContacList(){
        List<Contact> conList = [select id,lastname from contact limit 6];
        return conList;
    }
}

getcontactComp.cmp

<template>
 
        <template for:each={conList} for:item="contact">
            <lightning-card key = {contact.LastName} icon-name="standard:contact">
                <p>{contact.LastName}</p>
            </lightning-card>
        </template>
</template>

getcontactComp.js

import { LightningElement,track,wire,api} from 'lwc';
import getContacList from '@salesforce/apex/ContactController.getContacList';
export default class GetcontactComp extends LightningElement {

    @track conList ;
    @wire (getContacList) conList;
   
}

Using @wire to wire a function.

getcontactComp.js

 
import { LightningElement,track,wire,api} from 'lwc';
import getContacList from '@salesforce/apex/ContactController.getContacList';
export default class GetcontactComp extends LightningElement {

    @track conList ;
   @wire (getContacList)
    contactList({error,data}){
        if(error){
            console.log('error is#'+error);

        }
        else if(data){
            console.log('contact data#'+data);
            this.conList = data;
        }

    }
 
   
}

We will include component insde aura application and load the app. You will notice that contact details are displayed in inside lightning cards.

@wire with dynamic paramters

Call to apex method using @wire is executed at the time component loads. But suppose we want to make server call when a particular parameter changes.

So for that we can @wire an apex method with a dynamic parameter. We need to pass a parameter with “$” appended to it while making call to apex method. So, once the value of this property changes, call to apex is made at that time.

We will update the above components, and include a boolean property “showContacts”.

getcontactComp.html

<template>
    <template if:true = {showContacts}>
  
        <template for:each={conList} for:item="contact">
            <lightning-card key = {contact.LastName} icon-name="standard:contact">
                <p>{contact.LastName}</p>
            </lightning-card>
        </template>
  
    </template>
    <br>
    <lightning-input type="checkbox" label="Show Contacts" checked={showContacts} onchange={handleFlag}></lightning-input>

</template>

getcontactComp.js

import { LightningElement,track,wire,api} from 'lwc';
import getContacList from '@salesforce/apex/ContactController.getContacList';
export default class GetcontactComp extends LightningElement {

    @track conList ;
    @track showContacts = false;

    handleFlag(event){
        this.showContacts = event.target.checked;

    }
@wire (getContacList,{flag : '$showContacts'})
    contactList({error,data}){
        if(error){
            console.log('error is#'+error);

        }
        else if(data){
            console.log('contact data#'+data);
            this.conList = data;
        }

    } 
}

ContactController.cls

public class ContactController {
    @AuraEnabled(cacheable=true)
    public static List<Contact> getContacList(Boolean flag){
        List<Contact> conList = [select id,lastname from contact limit 6];
        return conList;
    }
}

Initially its value is kept false, so no contact list is displayed.

Once we click on “Show Contacts” button, this paramter is made true and since its value changes and it is used with @wire apex call, the @wire call is made which fetches the contact list and displays inside our component.

Imperative Apex Server Calls in LWC

Suppose you don’t want to call to an apex method when component gets loaded. You want to make call to the an apex method on click of a button or on certain logic, so for that we can make call to apex method in imperative way.

We will update our “GetcontactComp”. We will add a button “Get Contacts” to HTML file and bind it to getcontacts method in javascript file.

We will make call to apex method. Using then and catch you can get the result into your local variables as imperative call returns the promises so you have to resolve your promises into a result or error objects.

getcontactComp.html

<template> 
        <template for:each={conList} for:item="contact">
            <lightning-card key = {contact.LastName} icon-name="standard:contact">
                <p>{contact.LastName}</p>
            </lightning-card>
        </template>

   <lightning-button label="Get Contacts" onclick={getContacts}></lightning-button>
    <br>
</template>

getcontactComp.js

/* eslint-disable no-console */
import { LightningElement,track,wire,api} from 'lwc';
import getContacList from '@salesforce/apex/ContactController.getContacList';
export default class GetcontactComp extends LightningElement {

    @track conList ;
  // Using imperative call to server 
  getContacts(){
    getContacList().then(result => {
        console.log('result#'+result);
        this.conList = result;
        
    })
    .catch(error => {
        console.log('error#'+error);
       
    })
}
  
}

We will deploy the changes to salesforce org and reload the application. You can see “Get Contacts” button on screen.

Now if you click on button list of contacts will be displayed.

Thus, we can make call to apex class using @wire or imperatively based on our requirement.

So , we will wrap up this post here . Stay tuned for next posts !

Life Cycle Hooks In Lightning Web Components

A lifecycle hook is a callback method triggered at a specific phase of a component instance’s lifecycle. There are a number of life cycle hook methods available, we are going to discuss them one by one.

constructor()

  • Constructor is invoked when the component is created. It is similar to init method in aura component. Only difference here is that flow is from parent to child as opposite to that of init where the child component’s init is called first and then the parent component’s init gets called.
  • Since flow is from parent to child, do not access child elements in the component body because they don’t exist yet.
  • Also, do not access the element’s public properties , because they’re set after the component is created.
  • The constructor method’s first statement has to be super. It has to be a call to a super method with no parameters. Why it is required ? so that it can assign the proper prototype and value to “this” attribute.

connectedCallback()

  • Connectedcallback is Invoked when the component is inserted into DOM. That means whenever a component is created constructor is in invoked and whenever that component is inserted into Dom connected callback is invoked.
  • Since  flow is from parent to child, do not access child elements in the component body because they don’t exist yet.
  • We can access the Parent elements and modify them in this hook.

disconnectedCallback()

  • disconnectedCallback is invoked when component is removed from DOM.
  • This hook flows from parent to child.

render()

  • This hook is used to override the standard rendering functionality.
  • It gets called after connectedCallback() and it returns a valid HTML temaplate.
  • This hook flows from parent to child.

renderedCallback()

  • This hook is Called after component is rendered.
  • This hook flows from child to parent.

errorCallback(error, stack)

• This hook is called when the component throws an error in one of its hooks.

• The Error argument is a JavaScript native error object and the stack argument is a string.

• This method works like a JavaScript catch{} block for catching errors.

We will created two components lifecyclehooks and lifecycleChild and add above methods one by one.

lifecyclehooks.html

<template>
    <div>Inside Template 1</div>
    <c-lifecycle-child></c-lifecycle-child>
</template>

lifecyclehooks.js

import { LightningElement, api } from 'lwc';
import firsttemplate from './lifecyclehooks.html';
import secondtemplate from './lifecyclehooks2.html';
export default class Lifecyclehooks extends LightningElement {
@api templateno = 'temp1';
    constructor(){
        super();
        console.log('Inside constructor');
    }
    connectedCallback()
    {
        console.log('Inside connected callback');
    }
    disconnectedCallback(){
        console.log('Inside disconnected callback');
    }
    render()
    {
        console.log('Inside render');
        if(this.templateno==='temp1')
        return firsttemplate;
        else return secondtemplate;
    }
    renderedCallback(){
        console.log('insiderender callback');
    }
    errorCallback(error, stack)
    {
        console.log('error callback'+error);

    }
}

lifecycleChild.html

<template> 
</template>

lifecycleChild.html

import { LightningElement } from 'lwc';

export default class LifecycleChild extends LightningElement {
    connectedCallback() {
        throw new Error('Whoops!');
   }
}

We will add lifecyclehooks inside aura application and load the application. Notice the console log statements and observe the order in which each life cycle hooks gets executed.

Also, we have added the child component “lifecycleChild” to throw error from it, which is getting caught by lifecyclehooks component using errorCallback.

So , we will wrap up this post here . Stay tuned for next posts !

Communication Between Unrelated Components Using Publisher -Subscriber pattern(LWC)

In this post we are going to discuss about communication between components which are not within the same Dom tree using publisher subscriber pattern in Lightning web components.

Lets say we have two components firstly the “pubComp” component and second is a “subComp” component. “pubComp” component is a component from where we want to fire an event on certain button click or some UI event and “subComp”component is a component where we want to handle this event fired by the pub component.

  • Step 1 : Import pubsub.js into LWC project.

So for this the first thing we need to do is to include a JavaScript file name “pubsub” in your lwc directory. It is nothing but the shared JavaScript file which your two components will be using to communicate between themselvesSo for this the first thing we need to do is to include a JavaScript file name “pubsub” in your lwc directory. It is nothing but the shared JavaScript file which your two components will be using to communicate between themselves

pubsub.js

/**
 * A basic pub-sub mechanism for sibling component communication
 *
 * TODO - adopt standard flexipage sibling communication mechanism when it's available.
 */

const events = {};

/**
 * Confirm that two page references have the same attributes
 * @param {object} pageRef1 - The first page reference
 * @param {object} pageRef2 - The second page reference
 */
const samePageRef = (pageRef1, pageRef2) => {
    const obj1 = pageRef1.attributes;
    const obj2 = pageRef2.attributes;
    return Object.keys(obj1)
        .concat(Object.keys(obj2))
        .every(key => {
            return obj1[key] === obj2[key];
        });
};

/**
 * Registers a callback for an event
 * @param {string} eventName - Name of the event to listen for.
 * @param {function} callback - Function to invoke when said event is fired.
 * @param {object} thisArg - The value to be passed as the this parameter to the callback function is bound.
 */
const registerListener = (eventName, callback, thisArg) => {
    // Checking that the listener has a pageRef property. We rely on that property for filtering purpose in fireEvent()
    if (!thisArg.pageRef) {
        throw new Error(
            'pubsub listeners need a "@wire(CurrentPageReference) pageRef" property'
        );
    }

    if (!events[eventName]) {
        events[eventName] = [];
    }
    const duplicate = events[eventName].find(listener => {
        return listener.callback === callback && listener.thisArg === thisArg;
    });
    if (!duplicate) {
        events[eventName].push({ callback, thisArg });
    }
};

/**
 * Unregisters a callback for an event
 * @param {string} eventName - Name of the event to unregister from.
 * @param {function} callback - Function to unregister.
 * @param {object} thisArg - The value to be passed as the this parameter to the callback function is bound.
 */
const unregisterListener = (eventName, callback, thisArg) => {
    if (events[eventName]) {
        events[eventName] = events[eventName].filter(
            listener =>
                listener.callback !== callback || listener.thisArg !== thisArg
        );
    }
};

/**
 * Unregisters all event listeners bound to an object.
 * @param {object} thisArg - All the callbacks bound to this object will be removed.
 */
const unregisterAllListeners = thisArg => {
    Object.keys(events).forEach(eventName => {
        events[eventName] = events[eventName].filter(
            listener => listener.thisArg !== thisArg
        );
    });
};

/**
 * Fires an event to listeners.
 * @param {object} pageRef - Reference of the page that represents the event scope.
 * @param {string} eventName - Name of the event to fire.
 * @param {*} payload - Payload of the event to fire.
 */
const fireEvent = (pageRef, eventName, payload) => {
    if (events[eventName]) {
        const listeners = events[eventName];
        listeners.forEach(listener => {
            if (samePageRef(pageRef, listener.thisArg.pageRef)) {
                try {
                    listener.callback.call(listener.thisArg, payload);
                } catch (error) {
                    // fail silently
                }
            }
        });
    }
};

export {
    registerListener,
    unregisterListener,
    unregisterAllListeners,
    fireEvent
};

Lets explore the four important methods present inside this pubsub.js:


fireEvent :

The “fireEvent” method is used by the component which is supposed to fire the event and the parameter would be the page reference of a component which is
firing the event(pageRef) , the name given to the event(eventName) and whatever data the component needs to pass along with the event(payload).

registerListener :

register listener method would be used by the component which is handling the event. The parameter would be the “eventName” which will be same as
the name given earlier to the event . Next paramter is the callback method. This callback method would be any method inside the handling component which will handle the event and perform certain operations.

unregisterListener:

unregisterListener method is called by the handling component only when the component needs to unregister to the listener which it has already subscribed earlier.

unregisterAllListeners:

unregisterAllListeners removes all the listeners from the current component.

Other components will be using this library to communicate between them and other components can access this method because if you can see at the end we have exported these methods.

  • Step 2 : Publishing Event from “pubComp”
<template>
    <lightning-button label="call Event" onclick = {calEvent}></lightning-button>
</template>
import { LightningElement,wire,track } from 'lwc';
import {CurrentPageReference} from 'lightning/navigation';
import {fireEvent} from 'c/pubsub';


export default class PubComp extends LightningElement {
@wire (CurrentPageReference) pageRef;

    calEvent(event){
        var eventParam = {'firstname': 'KnowledgePredator'};
        fireEvent(this.pageRef,'pubsubevent',eventParam);

    }
}
<?xml version="1.0" encoding="UTF-8"?>
<LightningComponentBundle xmlns="http://soap.sforce.com/2006/04/metadata">
    <apiVersion>47.0</apiVersion>
    <isExposed>true</isExposed>
    <targets>
        <target>lightning__RecordPage</target>
        <target>lightning__AppPage</target>
        <target>lightning__HomePage</target>
    </targets>
</LightningComponentBundle>

We need to import the CurrentPageReference from lightning navigation library. CurrentPageReference will be contain the URL of our current page.

Import fireEvent from pubsub why because in the pub/sub library we have this fire event method and we have exported this method so our component can import this.

Use the fireEvent method which we have imported from our pub/sub library and pass the corresponding paramters to it.

Step 3 : Subscribe Event in “subComp”.

<template>
    <lightning-card  title = "Contact Details" icon-name="standard:contact">
        <p>{myName}</p>
    </lightning-card>
</template>
/* eslint-disable no-alert */
import { LightningElement,wire,track} from 'lwc';
import {registerListener,unregisterAllListeners} from 'c/pubsub';
import {CurrentPageReference} from 'lightning/navigation';
export default class SubComp extends LightningElement {
    @track myName = "Salesforce Predator";
    @wire (CurrentPageReference) pageRef;
    connectedCallback(){
        registerListener('pubsubevent',this.handleCallback,this);
    }

    disconnectedCallback(){
        unregisterAllListeners(this);
    }
 
    handleCallback(detail){
        alert('paramter from publisher'+ detail.firstname);
        this.myName = detail.firstname;
        
    }
}
<?xml version="1.0" encoding="UTF-8"?>
<LightningComponentBundle xmlns="http://soap.sforce.com/2006/04/metadata">
    <apiVersion>47.0</apiVersion>
    <isExposed>true</isExposed>
    <targets>
        <target>lightning__RecordPage</target>
        <target>lightning__AppPage</target>
        <target>lightning__HomePage</target>
    </targets>
</LightningComponentBundle>

In the subscriber component we need to import registerListener, unregisterAllListeners methods to register and unregister to the events.

In the connected callback we need to register to the same event which we published in “pubComp”. Also we need to pass the callback method while doing this, so there we will be handling paramters recieved from publisher component.

In the disconnected callback I need to unregister this particular event using unregisterAllListeners or unregisterListener methods.

In th handleCallback we are changing the value of paramter displayed with the new value recieved from publisher component as event paramter.

Lets deploy the changed to salesforce org and include the component inside a record page.

Initially you will notice that the value insde contact details is “Salesforce Predator”. Now If you will click on that “call Event” button , Event will be fired and value will be changed to “KnowledgePredator”.

So , we will wrap up this post here . Stay tuned for next posts !

Lightning Web Components:Communication Between Components From Child to Parent using Custom Events

In this post, we are going to discuss about communication between components from child to parent using custom events. Lightning web component uses Dom event to create and dispatch events.

Suppose, I have two components parent and child. First, we need to create event in child component using custom event and then we need to give name to that particular event. While naming the event we need to adhere to Dom event standards.

  1. There should not be any uppercase letter in the event name.
  2. No spaces allowed in the name of event.
  3. Suppose there are more than two words or over more than one word then we need to separate them using underscore.

Then we need to dispatch event using dispatch event method. Further, we need to define the handler of event in parent component. Remember when
defining the handler of event in parent component we need to use on before the event name.So in our case the name of event is button click so in the handler the the name of event would be onbuttonclick and then it can be binded to a JavaScript function which will do the further operations.

Lets implement this. We will create two components : testParent and testChild and follow the above given steps.

testParent.html

<template>
   
<c-test-child my-name = {chilparam} onbuttonclick = {handleClick}> </c-test-child>

</template>

testParent.js

import { LightningElement,track } from 'lwc';

export default class TestParent extends LightningElement {

    @track chilparam = 'second';
    handleClick(event){
        alert('inside handler of parent');
        this.chilparam = 'third';
    }
}

testChild.html

<template>
    <lightning-card>
        <lightning-button label="click me" onclick = {handleMe}></lightning-button>
    </lightning-card>

<lightning-card  title = "Contact Details" icon-name="standard:contact">
    <p>{myName}</p>
</lightning-card>

    </template>

testChild.js

import { LightningElement ,api} from 'lwc';

export default class TestChild extends LightningElement {
    @api myName = 'first';


    handleMe(event){
        const childEvent = new CustomEvent('buttonclick');//Created Event
        this.dispatchEvent(childEvent); // Dispatched the Event

    }
}

If you include the testParent component inside an aura application and load the application you will see “second” inside contact details.

Now if you will click the “click me” button , alert will popup and once alert is closed the value will be changed to value set in the event handler ie “third”.

Custom Events with Parameters

Now suppose along with the event I want to pass parameters also in the child component. For that, We need to use the detail property of a custom event.

We will update the above components. In the child component , We will create two buttons: “Send Parameters” for sending single paramter to parent component and “Send Multple Parameter” for sending multiple paramaters to parent component.

Sending Single Parameter

While sending the single parameter, we need to assing the value to detail property of event and add it alng with the event name at the time of event creation.Further in the parent component handler we can access it using dot notation say using “event.detail”

Sending Multiple Paramters

Suppose We want to pass multiple parameters then how to achieve that? We have to create a json object with key as paramter name and value as value of parameter.And then we need to add that json object along with the event name while creation of event. In the parent component handler , we need to access the paramters similar to the way in which we access json paramters.(ie using dot notation)

Lets see this with implemenation.

childTest.html

<template>
    <lightning-card>
        <lightning-button label="click me" onclick = {handleMe}></lightning-button>
    </lightning-card>
    <lightning-card>
        <lightning-button label = "Send Parameters" onclick= {handleParameterEvent}></lightning-button>
    </lightning-card>
    <lightning-card>
        <lightning-button label = "Send Multple Parameter" onclick= {handlemultiparameterEvent} ></lightning-button> 
     </lightning-card>

<lightning-card  title = "Contact Details" icon-name="standard:contact">
    <p>{myName}</p>
</lightning-card>

    </template>

childTest.js

/* eslint-disable no-alert */
import { LightningElement ,api} from 'lwc';

export default class TestChild extends LightningElement {
    @api myName = 'first';


    handleMe(event){
        const childEvent = new CustomEvent('buttonclick');//Created Event
        this.dispatchEvent(childEvent); // Dispatched the Event

    }
    handleParameterEvent(event){
        const paramEvent = new CustomEvent('sendparam',
            {
                detail : 'fourth'
            });
        this.dispatchEvent(paramEvent);
    }

    handlemultiparameterEvent(event){
        const multiparam = new CustomEvent('multievent',{
            detail:{
                firstparam : 'fifth',
                secondparam: 'sixth'
            }
        });
        this.dispatchEvent(multiparam);
        
    }
}

parentTest.html

<template>
   
    <c-test-child my-name = {chilparam} onbuttonclick = {handleClick} onsendparam = {handleParam} onmultievent = {handlemultiParam}> </c-test-child>
</template>

parentTest.js

import { LightningElement,track } from 'lwc';

export default class TestParent extends LightningElement {

    @track chilparam = 'second';
    handleClick(event){
        alert('inside handler of parent');
        this.chilparam = 'third';
    }

   handleParam(event){
        var eventparameter = event.detail;
        this.chilparam = event.detail;
    }
    handlemultiParam(event){
         this.chilparam = event.detail.firstparam + ' ' + event.detail.secondparam

    } 
}

Now if you will preview the application. Initial value inside contact details would be “second”. There will be two more buttons “Send Parameters” and “Send Multiple Parameters”.

If you will click on Send Parameters , the value inside contact details will be changed to “fourth”.

If you will click on Send Multiple Parameters , the value inside contact details will be changed to “fifth sixth”.

So , we will wrap up this post here . Stay tuned for next posts !

Lightning Web Components: Communicating from Parent to Child Component in LWC

In this post we will discuss about communication between components from parent to child. For example,if on certain events in parent component, I want to pass parameter
to child component or I want to execute certain logic in child component then how will I achieve it.

Passing the property values from parent to child component

Suppose I have two components, a parent component say “testParent” and a child component say “testChild” .

In the child component, We will declare a property with @API decorator say “myName”. This means, the property can be accessed outside of this component now in the parent component. We will set default value of this property say “Salesfore Predator”.

We will pass the value to this child components property from parent ,while declaring the child component inside the parent component.

testChild.html

<template>
    <lightning-card  title = "Contact Details" icon-  name="standard:contact">
        <p>{myName}</p>
    </lightning-card>
</template>

testChild.js

import { LightningElement ,api} from 'lwc';

export default class TestChild extends LightningElement {
    @api myName = 'Salesfore Predator';
}

testParent.html

<template>
   
    <c-test-child my-name = {chilparam} </c-test-child>


</template>

Notice the case while writing the child components name inside parent component. It has to be in a kebab case, also the property’s name is to be in a kebab case only.

testParent.js

import { LightningElement,track } from 'lwc';

export default class TestParent extends LightningElement {

    @track chilparam = 'Knowledge Predator';
        }

Now if you include the testParent inside an Aura App and preview the application, you will see that value passed from parent is displayed instead as it has overridden the child components value.

Calling Child component’s method from Parent

Suppose on click of certain event, say on click of button, We want to change the value passed to the child component in above example.

So, We will make changes to above components.

In child component we will add a method say “testChildMethod” which will recieve paramter also from parent component. Remember this method has to be public ie annoted by @api so that it can be accessed by other components. This method will display alert message and change the value of our “myName” property to “Salesfore Predator” again.

testChild.html

<template>
<lightning-card>
        <lightning-button label="click me" onclick = {handleMe}></lightning-button>
</lightning-card>
</template>

testChild.js

import { LightningElement ,api} from 'lwc';

export default class TestChild extends LightningElement {
    @api myName = 'Salesfore Predator';
    @api testChildMethod(parentParam){
        alert('this is child method'+parentParam.firstname);
        this.myName = 'Salesfore Predator';
    }
}

In parent component , We will add a button , which we will bind to a javascript function and from javascript function we will make call to child components method.

testParent.html

<template>
   
    <c-test-child my-name = {chilparam}> </c-test-child>

    <lightning-button label = 'Call Child Method' onclick={handleCall}></lightning-button>
</template>

testParent.js

import { LightningElement,track } from 'lwc';

export default class TestParent extends LightningElement { handleCall(event){
      var childCompVar  = this.template.querySelector('c-test-child');
      var sendParam = {'firstname': 'Salesforce'};
      childCompVar.testChildMethod(sendParam);
          

    }
}

Notice the syntax while accessing the child component and its method in parent component javascript file.

 this.template.querySelector('div')    - >  This returns the first  div element.
 this.template.querySelectorAll()      - >   This returns array of all div elements in the component

Reload the application. Once you click on ‘Call Child Method’ , alert will pop up which displays the paramter passed from parent component.

Once you close the alert , you wil see the property value will be changed to ‘Salesforce Predator’ again.

So , we will wrap up this post here . Stay tuned for next posts !

Decorators and Properties in Lightning Web Components

Decorators in LWC

There are three majorly use decorators in lightning web components:

  • @api

@api decorators is used to make properties or methods in lightning web component public this way they are accessible outside of the component in which they are declared. For example a parent component can set the value of a property in a child component

  • @track

@track decorator is basically used to make properties or a method
private in lightning web components this property is not accessible outside of lightning that component when in which it is declared

  • @wire

@wire is basically used to read the Salesforce data from apex class into lightning web component. It is generally used while making a server calls to apex class .

Properties in LWC

There are two types of properties in lightning web components:

  • Reactive Properties
    • In case of reactive properties if the value of property changes component gets every rendered

Reactive properties are of two types :

  1. Public reactive properties : Public reactive properties are the one which are declared using @api decorator
  2. Private reactive properties: Private properties are the one which are declared using @track decorators.

  • Non Reactive Properties

Non reactive properties are declared without any decorator ,so even if the value of non reactive property changes component does not get re-render .

However, as per Salesforce Spring ’20 Release Notes , All properties are made reactive proeprties.If property value changes, and the property is used in a template or if a getter of a property that’s used in a template, the component rerenders and displays the new value.

Lets understand all these with the help of exmaples:

We will create two components, one inside another . Let child component be childY and parent be parentY.

childY component

We will create three properties in child component lets say “trackParam”, “apiParam”, “nonReactiveProp” where “trackParam” is private reactive property as it is annoted with @track, “apiParam” is public reactive property as it is annoted with @api and “nonReactiveProp” is non reactive propertiy in javascript file.

Also we have added default values to these properties.Further we have added a button “Test Behaviour” on click of which we will change the value of properties one by one to check the behaviour of component.

childY.html

<template>
<lightning-card title="trackProprtyDemo" icon-name="standard:account">
    Hello {trackParam}
</lightning-card>
<lightning-card title="apiPropDemo" icon-name="standard:account">
    Hello {apiParam}
</lightning-card>
<lightning-card title="nonReactiveDemo" icon-name="standard:account">
    Hello {nonReactiveProp}
</lightning-card>

<div>
    <lightning-button label="Test Behaviour" onclick = {handleparamValues}></lightning-button>
</div>


</template>

childY.js

import { LightningElement,track,api} from 'lwc';

export default class ChildY extends LightningElement {

    @track trackParam = "trackValue";
    @api apiParam = "apiValue";
    nonReactiveProp = "nonReactiveValue";

    handleparamValues(){
       this.trackParam = "value changed for trackParam";
       this.apiParam = "Value changed for APIParam";
       this.nonReactiveProp = "value changed fro non reactive Param";
    }

}

parentY

In the parent component, we are just passing the value to apiParam property of childY component as it is public property.

parentY.html

<template>
    <c-child-y api-param="api Value from Parent" track-param = "track value from parent"></c-child-y>

</template>

parentY.js

import { LightningElement } from 'lwc';

export default class ParentY extends LightningElement {}

Now if you include parent component inside Aura application and load the application you will notice that for “trackParam”and “nonReactiveProp” properties the default values in JS file are displayed and for “apiParam” property , the value passed from parent component is displayed.

Now , If you click on Test Behaviour button, the value of all these properties changes and component gets re-render and new values are displayed.

So , we will wrap up this post here . Stay tuned for next posts !

Lightning Web Component Bundle – Folder Structure

We are going to discuss Lightning Web Component Bundle and files present in it in brief. If you create a LWC project , you will notice a folder is created along with files present in it.

We will create a LWC project in our VS code and name it as “welcomeHello”.The LWC component bundle created will look like this:

You will notice three files are created by default ie HTML file, Javascript file, and configuaration XML file.

Naming Convention

1.You can’t create a Lightning web component with same name as that of Aura component in the same namespace. For example, if you have an Aura component named c:welcomeHello,you can’t create a Lightning web component named c-welcomeHello.

2. While naming the LWC folder we have to name it in camel case like “welcomeHello”. But when refering to the component in markup,it maps to kebab case “<c-welcome-hello>”.

We will discuss following files one by one in detail:

HTML File

Every UI component must have an HTML file with root tag “template” so if you want to have any UI element like headings or paragraph we need to place inside these template tags.

HTML file follows naming convention of <component>.html , in our case , welcomeHello.html.

<template>
    <lightning-card title="HelloWorld" icon-name="custom:custom14">
        <div class="slds-m-around_medium">
            <p>Hello, {greeting}!</p>
        </div>
    </lightning-card>
</template>

We can use standard HTML , Directives like if:true,for:each or base LWC components to develop desired HTML file

Javascript File

Every LWC component must have a JavaScript file. The JavaScript file defines the behaviour of HTML elements present in HTML file.

The JavaScript file follows the naming convention <component>.js, in our case  “welcomeHello.html”. JavaScript files in Lightning web components are ES6 modules, that means everything is local by default.

import { LightningElement,track } from 'lwc';
export default class WelcomeHello extends LightningElement {
    @track greeting = 'World';
}

In first staement, ‘lwc’ is nothing but a module which contains independent and reusable codes.

LightningElement is a custom wrapper class of a standard HTML element.

First we import LightningElement from lwc module and then we extends that particular LightningElement by creating our WelcomeHello class.

The export before class suggest that this class can be imported by other LWC components.

Configuration File – XML file

Configuration file defines the metadata values for the component. For example, the design configurations for lightning app builder or a community builder, so if you want to use your component inside the app page or record page or homepage or community then you need to specify those configuration here inside the meta file.

<?xml version="1.0" encoding="UTF-8"?>
<LightningComponentBundle xmlns="http://soap.sforce.com/2006/04/metadata" fqn="welcomeHello">
    <apiVersion>46.0</apiVersion>
    <isExposed>true</isExposed>
    <targets>
        <target>lightning__AppPage</target>
        <target>lightning__RecordPage</target>
        <target>lightning__HomePage</target>
    </targets>
</LightningComponentBundle>

The configuration file follows the naming convention <component>.js-meta.xml in our case, “welcomeHello.js-meta.xml”.

API version parameter binds lightning web component to the Salesforce API version.

“isExposed” parameter decides whether the component is accessible inside a lightning app builder or community builder or not. So, if it is false it is not accessible.

“targets” parameter specifies where this component can be used like inside APPpage, records page or Home page etc.

CSS file

CSS file is not present by defualt at the time of component creation, but we can create it as an when required.

It has to have same name as that of folder. Naming convention would be <component.css> in our case – “welcomeHello.css”.

div{
    background-color: red;
}

SVG File

SVG file is not present by defualt at the time of component creation, but we can create it as an when required.SVG file is required if we want to use a custom icon in Lightning App Builder or Community Builder.

Additional Javascript Files

We can also include some additional JavaScript files in your Lightning web component folder.These files are generally used for sharing particular code snippets with other lightning web components or also for including some external javascript files.

These additional JavaScript files must be ES6 modules and names must be unique within the component’s folder.

We are going to learn more about this when we will use pub/sub model for communication between lightning web components

Stay tuned for next post !